This is a insect origami tutorial book, it is from a japanese fans. He shared it for everyone. The contents of the book are many origamis, include "Three types of beetle", "Stag Beetle", "Hercules Beetle" and "Kabuto Mushi (Helmet Beetle)". Skill Level is Easy-Moderate. You can download this Origami Tutorial Book from here
In this blog you'll find tips and template that was related with your hobby about paper craft, origami, and another art of papers
Showing posts with label origami template. Show all posts
Thursday, April 10, 2014
Tuesday, April 8, 2014
Origami Cross Instructions
This lovely origami cross is made from a single strip of paper.
For a printable pdf version of the cross instructions, click here. You will need Adobe Reader installed on your computer in order to open the .pdf file. You can get Adobe Reader here.
Begin with a strip of paper approx.
0.7 cm X 30 cm, coloured side up.
|
1. Fold one third down the strip.
|
2. Fold end around back.
|
3. Fold around front.
|
4. Fold the end in front.
|
5. Fold section around the back, past the centre and tuck back into centre of model. Make sure the 2 sections indicated are of equal size.
|
6. Fold whole section down.
|
7. Pull bottom of paper through and up centre section of cross.
|
8. Fold down along crease shown, and thread through centre again.
|
9. Fold up behind cross and tuck the end underneath the centre square.
|
Turn over.
Finished cross
|
Sunday, April 6, 2014
Origami Lily Instructions
The origami lily, also know as the iris, is a beautiful design. It takes a little longer than the other simple flowers, but stick with it, because the end result is worth it!
Make the lily with colourful or patterned paper so it looks it's best, and you could make a few of different sizes to group together if you like... it creates a lovely display.
For a printable .pdf version of the lily instructions, click here.
You will need Adobe Reader installed on your computer in order to open the .pdf file. You can get Adobe Reader here
1. Start with your paper coloured side up.
Fold in half, then in half again, as shown. Crease well, then open out again.
|
2. Turn the paper over and fold in half diagonally and in both directions. Crease well and open out once again.
|
3. Holding the points shown, bring them both down to the centre point on the bottom line. Flatten model. This is called a waterbomb base.
|
4. Fold the top triangle into the centre and unfold. Using this crease, open out the triangle and flatten.
|
5. You'll need to repeat step 4 on all four of the flaps of the waterbomb base. The model will now look like this.
|
6. On the uppermost diamond, fold the outside corners into the centre line, crease well then open.
|
7. Fold the whole model in half and open.
|
8. Using the creases made in step 6 and 7, lift the bottom point of the model (the uppermost layer only) up to the top point, bringing in the sides of the model at the same time, as shown.
|
9. Repeat steps 6, 7 and 8 on each if the four sides. The model should now look like this.
|
10. Now fold down each of these triangles, on all four sides.
|
11. Rotate model upside down, so the open part is at the top.
| ||
12. Fold the outer flaps toward the centre and flatten.
|
13. Repeat step 12 on all four sides of the model. The model should now look like this.
|
14. Fold down all petals, opening the flower as you go.
| ||
Completed Lily!
|
Origami Horse Instructions
Diagram
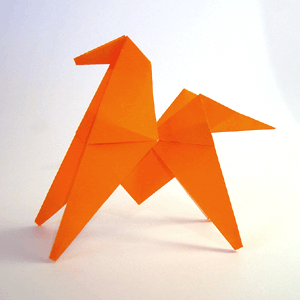
The fantastic origami horse is a favourite amongst anyone who has made it! It's a simple model to make, and once you have finished... just a sharp tap on the tail and the horse will flip for you!
For a printable pdf version of the horse instructions, click here. You will need Adobe Reader installed on your computer in order to open the .pdf file. You can get Adobe Reader here.
Diagram Instructions
1. Start with a square piece of paper, coloured side up. Fold the paper in half, crease well and open, and then fold again in the other direction.
|
2. Turn the paper over to the white side. Fold the paper in half, crease well and open, and then fold again in the other direction. Your creases should look like this.
|
3. Using the creases you have made, bring the top 3 corners of the model down to the bottom corner. Flatten model.
4. Fold upper layer's outside corners toward centre line, then fold the top downward along the crease shown. Unfold.
|
5. Cut only top layer up to the top crease.
|
6. Fold the "legs" upwards along the creases shown.
|
7. Fold these sections in half, toward the centre.
|
8. Turn model over and repeat steps 4-7 on other side. The model should now look like this.
|
9. Rotate model and make creases as shown. Unfold.
|
10. Inside Reverse Fold the head and the tail. Finished Horse!
|
Optional Step: Blunt the 4 feet of the horse by folding the tips upward on the inside of the model.
|
To make the horse do a somersault, sharply tap upwards under his tail.
|
Origami Hat Instructions
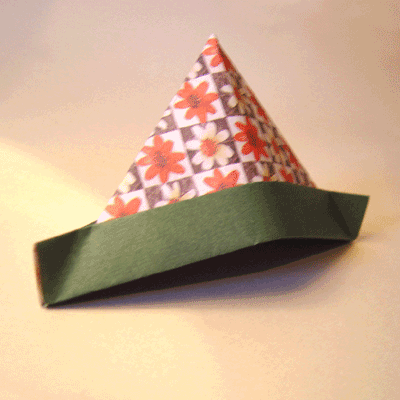
The Origami Hat is a great model for kids to make, because it's so simple and fun to wear afterwards!
Use a large piece of paper, or newspaper for this design.
For a printable .pdf version of the hat instructions, click here. You will need Adobe Reader installed on your computer in order to open the .pdf file. You can get Adobe Reader here.
1. Start with a rectangular piece of paper, white side up. Fold the paper in half and open.
|
2. Now fold the top down to the bottom edge. Crease well.
|
3. Fold the top corners down to the centre line.
|
4. Fold the bottom edge (uppermost layer only) up to the base of the triangles.
|
5. Fold this part up once again, and crease well.
|
6. Turn model over, and repeat step 4 & 5 on the other side.
|
7. Open out the hat to shape it,Your hat is now finished!
|
Subscribe to:
Posts (Atom)